

Introduction
Technology is a lifesaver—until it isn’t. From slow internet connections to printer malfunctions, everyday tech issues can bring your productivity to a grinding halt. But here’s the good news: you don’t have to be a tech wizard to solve these problems! In this blog, we’ll walk you through 10 simple, step-by-step ‘how-to’ solutions for the most common IT headaches. Whether it’s troubleshooting your Wi-Fi, fixing that unresponsive keyboard, or speeding up your sluggish computer, these practical tips will help you take control of your tech and get back to what matters most. Let’s dive in and make IT problems a thing of the past!
1. How to Troubleshoot Internet Connectivity Problems
Internet issues and no internet connection messages can disrupt your daily tasks. Sometimes it says internet is connected without internet which is equally frustrating. Here’s how you can troubleshoot:
1. Check Your Hardware
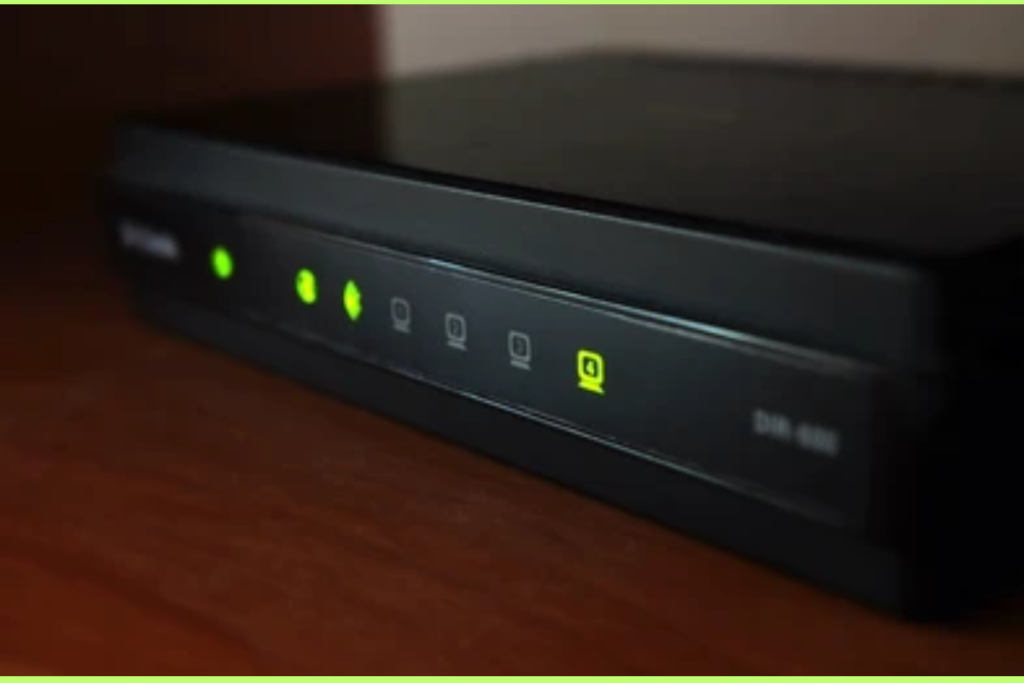
- Modem and Router: Make sure that your modem and router are plugged in correctly and powered on. Check the lights on both devices. Typically, a solid green or blue light indicates a healthy connection, while red or blinking lights suggest a problem.
- Cables: Inspect all cables (Ethernet, power, etc.) for any visible damage. Make sure everything is securely plugged in.
- Reboot Devices: Sometimes, simply restarting your modem and router can resolve connectivity issues. Disconnect both the devices, then wait for 30 seconds, and then connect them back again. Allow a few minutes for them to restart and reconnect.
2. Check Your Device’s Wi-Fi or Ethernet Connection
- Wi-Fi Connection: If you’re using Wi-Fi, ensure your device is connected to the correct network. Sometimes, you might accidentally connect to a different network or a guest network.
- Ethernet Connection: If you’re using a wired connection, ensure that the Ethernet cable is properly connected to both your device and the router or modem.
- Airplane Mode: If you’re on a mobile device, confirm that airplane mode is off, as it can disable Wi-Fi.
3. Check for Network Interference
- Signal Range: If you’re too far away from the router, the Wi-Fi signal might be weak. Try to get close to the router and monitor if the connection improves.
- Interference: Other devices, like microwaves, baby monitors, and cordless phones, can interfere with Wi-Fi signals. Try moving the router away from these devices to reduce interference.
- Channel Overlap: If there are many Wi-Fi networks around you, they might be overlapping, causing interference. You can change the Wi-Fi channel on your router to reduce congestion.
4. Test Your Internet Speed
- Speed Test: Run a speed test (using websites like Speedtest.net or Fast.com) to see if your internet is slower than usual. If the speed is much lower than what your service provider promised, this might indicate an issue with your ISP (Internet Service Provider).
- Compare Wired vs. Wireless: If you’re using Wi-Fi, test your connection with a wired Ethernet connection if possible. A significant difference in speed may indicate Wi-Fi issues rather than a problem with your internet service.
5. Restart Your Device
Sometimes, the issue might be with your computer, phone, or other device, rather than the internet connection itself.
- Restart Your Device: Close all open applications and restart your device. This can resolve issues caused by software glitches or background processes using up bandwidth.
6. Clear Your Browser Cache
If you’re able to connect to the internet but can’t load specific websites:
- Clear Cache and Cookies: Sometimes a corrupted cache can cause issues with loading websites. Clearing your browser’s cache and cookies can often tackle this problem. To do so, go to your browser settings and look for “Clear browsing data.”
7. Check Your DNS Settings
- DNS Problems: Sometimes, DNS issues can cause problems with loading websites. You can change your DNS settings to use a faster, more reliable service like Google DNS or OpenDNS.
- Google DNS:
- Preferred DNS: 8.8.8.8
- Alternate DNS: 8.8.4.4
- OpenDNS:
- Preferred DNS: 208.67.222.222
- Alternate DNS: 208.67.220.220
- To change your DNS, go to your device’s network settings and look for DNS options. Replace the default DNS with one of these options.
- Google DNS:
8. Disable VPN or Proxy
If you’re using a VPN (Virtual Private Network) or proxy, it can sometimes interfere with your internet connection:
- Turn Off VPN/Proxy: Disable any active VPN or proxy settings and check if the internet works without them.
9. Update Your Network Drivers
- Update Drivers: If you’re using a computer, outdated network drivers can cause connectivity issues. Check your device’s Device Manager (Windows) or System Preferences (Mac) to ensure your network adapter drivers are up to date. You can get the latest drivers from the manufacturer’s website.
10. Contact Your Internet Service Provider (ISP)
If the above methods don’t work, the issue might be at your ISP’s end.
- Outages: Check with your ISP to see if there’s a known outage in your area.
- Technical Support: If there’s no outage, ask your ISP’s technical support for help. They can run diagnostics and help troubleshoot further.
2. How to Recover Deleted Files in Windows and Mac
Losing important files can be stressful, but the good news is that there are several ways to files recovery on both Windows and Mac systems. Here’s a step-by-step guide to help you recover lost files from both platforms.
Recover lost files on Windows
1. Check the Recycle Bin

- What to Do: The first step is to check the Recycle Bin. If your file got accidentally deleted, it might still be in the bin.
- Double-click the Recycle Bin icon located on your desktop and open it.
- Look for the lost file. Once you locate the file, right-click on it and choose Restore to return it to its original folder.
2. Use File History
If you have File History enabled on your Windows PC, you can restore lost files from a backup.
- What to Do:
- Enter File History in the Windows search bar and choose Restore your files with File History.
- Go to the folder where your lost file got located.
- Browse the list of deleted items, select the file you wish to retrieve, and click the Restore button to recover it.
3. Restore from a Backup
If you use Windows Backup or any third-party backup solution, you can restore files from your backup.
- What to Do:
- Go to the Control Panel and navigate to System and Security > Backup and Restore.
- Select Restore my files and follow the prompts to recover the lost file from your backup.
4. Use a Data Recovery Software
If the file is not in the Recycle Bin or backed up, you can use third-party data recovery software like Recuva or EaseUS Data Recovery Wizard.
- What to Do:
- Download and install the data recovery tool.
- Launch the software and select the drive where your file was stored.
- Run a scan to detect any missing files and select the ones you need to restore.
- Follow the on-screen instructions to recover the files.
Recover Lost Files on Mac
1. Check the Trash
Like Windows, Mac stores deleted files in the Trash.
- What to Do:
- Open the Trash by selecting the icon from the dock.
- Look for the lost file. If you happen to find it in the Trash, right-click and choose Put Back to restore it to its original location.
2. Use Time Machine Backup
If you have Time Machine set up, it’s one of the easiest ways to restore lost files.
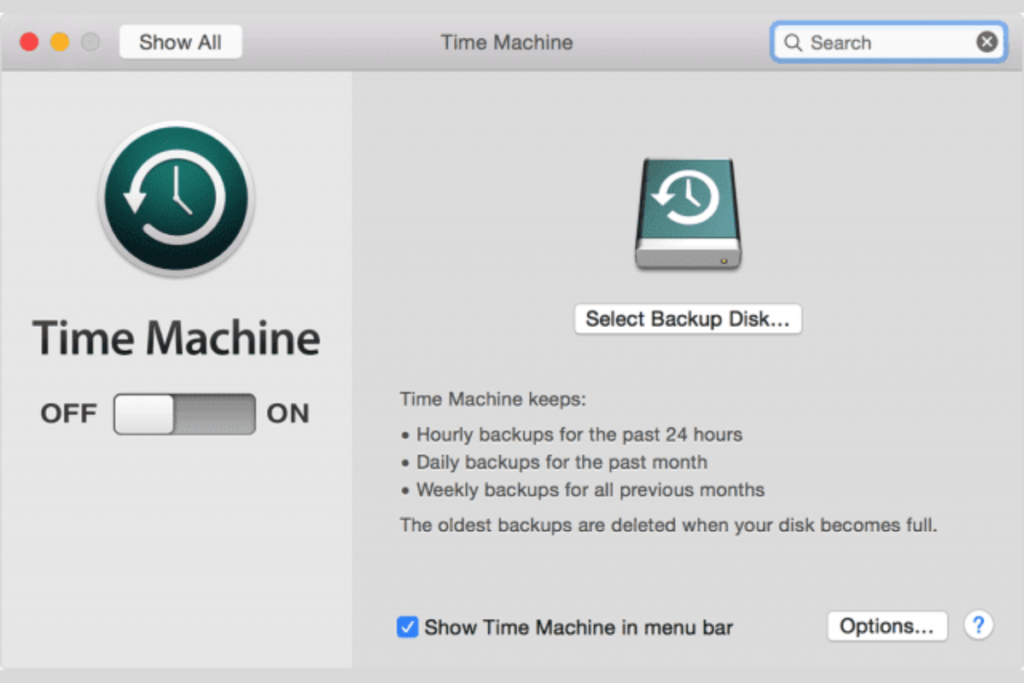
- What to Do:
- Connect the Time Machine backup drive (if it’s an external drive).
- Open the folder where your lost file was found.
- Click on the Time Machine icon in the menu bar, then select Enter Time Machine to begin browsing your backups.
- Use the timeline on the right to scroll back to a time when the file was still there.
- Select the file and click Restore.
3. Use iCloud Drive (for iCloud Users)
If you use iCloud to store your files, your deleted file might still be available in iCloud Drive.
- What to Do:
- Visit iCloud.com using your web browser.
- Sign in with your Apple ID to view and manage your files and backups.
- Open iCloud Drive and check the Recently Deleted folder.
- If you find your file, select it and click Recover.
4. Use Data Recovery Software like Disk Drill
If your file is not in the Trash or Time Machine, you can use third-party software like Disk Drill or Data Rescue to recover lost files.
- What to Do:
- Download and install a data recovery tool.
- Open the recovery software and select the drive where the missing file was previously saved.
- Start a scan to search for recoverable files.
- Once the scan is complete, browse through the results, select your lost file, and click Recover.
Tips for Preventing Future File Loss
- Regular Backups: Regularly back up your files using external drives, cloud services, or backup software (e.g., Time Machine for Mac, File History for Windows).
- Enable Version Control: For documents, use version control in applications like Microsoft Word or Google Docs to ensure you can retrieve earlier versions.
- Cloud Storage: Consider using cloud storage services like Google Drive, OneDrive, or Dropbox to automatically sync and back up important files.
By following these steps, you can easily recover your lost files on both Windows and Mac. Remember, regular backups are crucial to preventing data loss in the future!
3. Troubleshooting “USB Device Not Recognized” Errors
Encountering the “USB Device Not Recognized” error can be frustrating, especially when you’re trying to use an important peripheral, such as a flash drive, keyboard, or printer. This issue typically occurs when your computer fails to detect the USB device, either due to hardware problems, driver issues, or conflicts.
1. Basic Troubleshooting
Step 1: Check the USB Port
- What to Do: Inspect the USB port to ensure it’s not damaged or dirty. Plug the USB device into an alternate port to see if the issue is with the initial port.
- Test Another Device: Plug a different USB device into the same port to check if it’s working. If the device works in a different port, the problem may be with the original USB device.
Step 2: Restart Your Computer
Restarting the system can sometimes fix temporary USB connection issues.
- What to Do: Save your work, close all programs, and restart your computer. After restarting, plug the USB device back in to see if it is recognized.
2. Check Device Manager (For Windows Users)
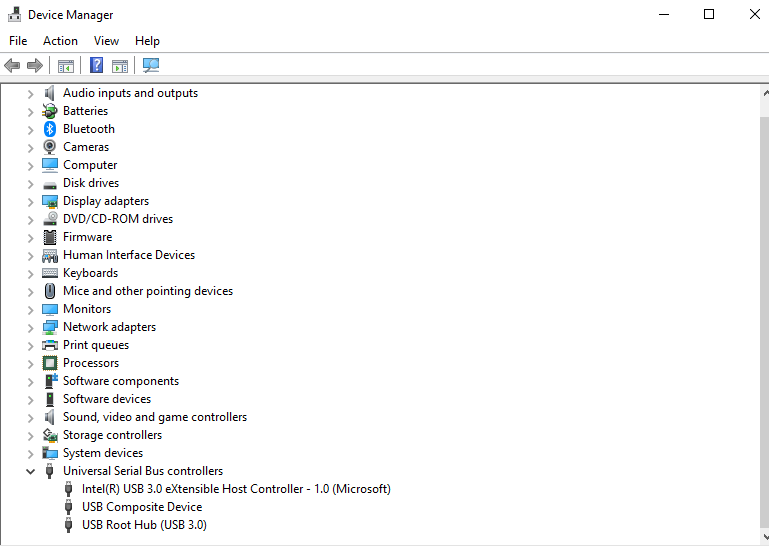
Step 1: Open Device Manager
- What to Do: Press Windows + X and go to Device Manager from the menu.
Step 2: Locate Universal Serial Bus Controllers
- Open Device Manager.
- Expand the Universal Serial Bus Controllers section.
- If there is a yellow warning triangle next to any of the devices, it indicates a problem with the driver or device.
Step 3: Uninstall and Reinstall the USB Driver
- What to Do:
- Right-click on the device with the warning symbol (it could be listed as Unknown Device).
- Select Uninstall device.
- After uninstallation, restart your computer. Windows will automatically attempt to reinstall the USB driver upon reboot.
Step 4: Update USB Drivers
- What to Do:
- Right-click on Universal Serial Bus Controllers and choose the option Update driver.
- Choose Search automatically for updated driver software.
- If driver updates are available, follow the prompts to complete the installation.
3. Check Disk Management (For Windows Users)
Step 1: Open Disk Management
- What to Do: Right-click on the Start button and select Disk Management.
Step 2: Check if the USB Drive is Listed
- What to Do: If the USB device is not showing as a recognized device in File Explorer but is listed in Disk Management, it might not have a drive letter assigned.
- Right-click the USB drive and choose Change Drive Letter and Paths.
- Click Add, then select a letter from the dropdown and click OK.
4. Disable USB Selective Suspend Setting (For Windows Users)
Step 1: Access Power Options
- What to Do: Open Control Panel, then go to Power Options.
Step 2: Change Plan Settings
- Click on Change plan settings beside your active power plan, then proceed to Change advanced power settings.
Step 3: Modify USB Settings
- What to Do: Scroll down to USB settings > USB selective suspend setting, and set it to Disabled.
- Click Apply and OK to save changes.
5. Reset SMC (System Management Controller) on Mac
If you’re using a Mac and facing USB connectivity issues, resetting the System Management Controller (SMC) may resolve the problem.
Step 1: Shut Down Your Mac
- What to Do: Shut down your Mac completely.
Step 2: Reset the SMC
- For MacBooks with a T2 chip:
- Press and hold the Power button for 10 seconds before release it.
- After a brief pause, restart your Mac.
- For MacBooks without a T2 chip:
- Press Shift + Control + Option keys on the left side of the keyboard and the Power button simultaneously for 10 seconds.
- Release all keys and turn on your Mac.
6. Reset PRAM (Parameter RAM) on Mac
If resetting the SMC doesn’t work, try resetting the PRAM to resolve USB detection issues.
Step 1: Shut Down Your Mac
- What to Do: Shut down your Mac completely.
Step 2: Reset PRAM
- Press the Option + Command + P + R keys simultaneously while turning on your Mac.
- Keep holding the keys for about 20 seconds. This will reset the PRAM, which stores settings related to USB connections and other hardware preferences.
7. Try the Device on Another Computer
To ensure the USB device itself isn’t faulty, test it on another computer. If the device still isn’t recognized, there might be an issue with the device, such as physical damage or corruption.
8. Use a Different USB Cable (If Applicable)
For external drives or devices that use a USB cable (like printers or hard drives), the cable itself could be damaged. Try using a different USB cable to see if the device is recognized.
9. Update Your Operating System
Sometimes, outdated system software can cause compatibility issues with USB devices. Make sure your operating system is updated with the most recent patches and updates.
- For Windows: Go to Settings > Update & Security > Windows Update.
- For Mac: Go to the Apple menu > System Preferences > Software Update.
10. Check for Hardware Issues
If none of the software solutions work, it can be assumed that it could be because of a hardware issue with your USB ports or the device itself. If possible, consult with a technician or take your device to an authorized service center for further diagnosis.
4. How to Perform Regular PC Maintenance for Better Performance
1. Regularly Update Your Operating System and Software
What to Do:
- For Windows:
- Open Settings > Update & Security > Windows Update.
- Click Check for Updates to ensure that you’re running the latest version of Windows.
- For Mac:
- Go to the Apple Menu > System Preferences > Software Update.
- Enable automatic updates to keep your system up-to-date.
- Update all installed programs to their latest versions, as outdated software can slow down your PC and create security risks.
2. Clean Up Temporary Files and Cache
What to Do:
- For Windows:
- Open the Start menu and type “Disk Cleanup”.
- Select the Disk Cleanup tool and choose the drive you want to clean (typically the C: drive).
- Choose the files you want to delete (e.g., temporary files, system cache) and click OK.
- For Mac:
- Go to Finder > Go > Go to Folder.
- Type ~/Library/Caches/ and delete unnecessary cache files.
- You can also use a third-party app like CleanMyMac to clean temporary files and system junk.
3. Defragment Your Hard Drive (For HDD)
What to Do:
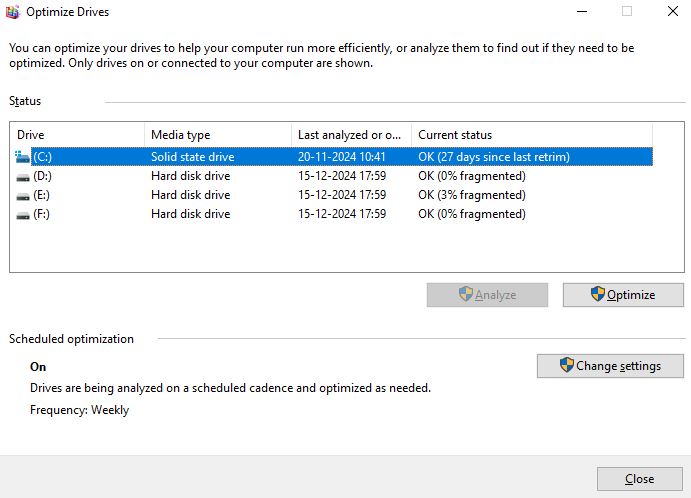
- For Windows:
- Enter Defragment and Optimize Drives in the search field
- Select the drive you need to defragment (commonly the C: drive).
- Click Optimize to start the process.
- For Mac:
Mac OS doesn’t require defragmentation because it automatically handles file organization on its own.
4. Run Antivirus and Malware Scans
What to Do:
- For Windows:
- Use Windows Defender or a third-party antivirus software (e.g., Avast, Bitdefender) to run full system scans.
- Ensure that your antivirus software is always up to date and has real-time protection enabled. Perform routine scans to maintain your system’s security
- For Mac:
While macOS is less prone to viruses, you can still use tools like Malwarebytes for Mac to check for any potential malware. Perform routine scans to maintain your system’s security. -
5. Uninstall Unnecessary Programs
What to Do:
- For Windows:
- Open Settings > Apps.
- Browse through the list of installed programs and click Uninstall for any programs you no longer use.
- For Mac:
- Open Finder > Applications.
- Drag any unused apps to the Trash or use an uninstaller if available.
6. Clean and Organize Your Hard Drive
What to Do:
- Organize Files:
- Move personal files (photos, videos, documents) to external drives or cloud storage to keep your PC’s storage free for system files and applications.
- For Windows:
- You can use Disk Cleanup (as mentioned in Step 2) to remove unnecessary files. You can also enable Storage Sense under Settings > System > Storage, which automatically deletes temporary files.
- For Mac:
- Consider using Time Machine to back up and remove old files from your internal storage. Regularly make sure to check for large or duplicate files that you no longer need and remove them to free up space.
7. Update Drivers and Firmware
What to Do:
- For Windows:
- Launch Device Manager by searching for it in the search bar.
- Right-click on any device (e.g., display adapter, sound card) and select Update driver.
- You can also use third-party software like Driver Booster to automatically update all outdated drivers.
- For Mac:
macOS automatically updates drivers with system updates, so make sure you are regularly installing the latest macOS version.
8. Monitor System Performance and Resource Usage
What to Do:
- For Windows:
-
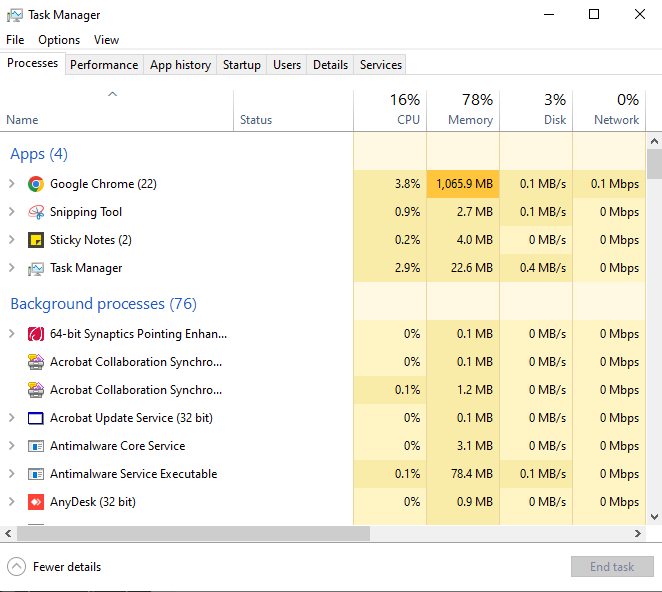
- Press Ctrl + Shift + Esc to open Task Manager.
- Check the Processes tab to see which programs are using the most resources.
- Terminate unnecessary processes by right-clicking and choosing End Task.
- For Mac:
- Open Activity Monitor from Applications > Utilities.
- Check the CPU, Memory, and Disk tabs to identify resource-hogging apps.
9. Perform Regular Backup
What to Do:
- For Windows:
- Open Control Panel > Backup and Restore.
- Set up regular backups to an external drive or cloud storage service like OneDrive.
- For Mac:
- Use Time Machine to back up your system automatically to an external drive.
- Enable iCloud Backup for documents and data sync.
10. Physically Clean Your Computer
What to Do:
- Turn off your computer and unplug it.
- Use a can of compressed air to clean the vents and fans in your laptop or desktop.
- Wipe down your keyboard, monitor, and other external parts with a microfiber cloth to keep your PC clean.
5. How to Update Drivers Safely on Windows
1. Use Windows Update to Update Drivers
What to Do:
- Open Settings: Press Windows + I to open the Settings menu.
- Go to Update & Security: In the Settings window, select Update & Security.
- Check for Updates: Click on Windows Update from the left sidebar and select Check for Updates option.
- Install Updates: If updates are available, Windows will automatically download and install them. This may include both system updates and driver updates.
- Restart your computer if asked to finish the installation.
2. Use Device Manager to Update Drivers
What to Do:
- Open Device Manager: Right-click on the Start button and choose Device Manager from the list.
- Expand the Category: In Device Manager, expand the category for the hardware device you want to update (e.g., Display adapters for your graphics card or Network adapters for your Wi-Fi card).
- Update Driver: Right-click the specific device and choose Update Driver.
- Choose Update Option: You will be given two options:
- Search automatically for updated driver software: This allows Windows to search the web and your computer for the latest driver updates.
- Browse my computer for driver software: This allows you to manually select a driver file you’ve downloaded from the manufacturer’s website.
- Follow On-Screen Instructions: If a driver update is found, follow the on-screen prompts to install it.
3. Download Drivers from the Manufacturer’s Website
What to Do:
- Identify Your Hardware: First, you need to know the exact make and model of the hardware device. You can find this in Device Manager under the device properties.
- Go to the Manufacturer’s Website: Visit the official website of the hardware manufacturer (e.g., NVIDIA, Intel, AMD, Realtek, etc.).
- Search for Drivers: Navigate to the “Support” or “Downloads” section of the website and search for your specific device model.
- Download the Driver: Download the correct driver for your operating system version (e.g., Windows 10, 64-bit).
- Install the Driver: Once downloaded, run the installer and follow the instructions to install the driver.
4. Use Driver Update Tools
What to Do:
- Choose a Trusted Driver Update Tool: Some popular tools include Driver Booster, DriverPack Solution, and SlimDrivers.
- Install the Software: Download and install the driver update tool from the official website.
- Scan for Outdated Drivers: Launch the software, and let it scan your system for outdated drivers.
- Update Drivers: The tool will show you which drivers need updating. Select the ones you want to update and click Update to install the latest versions.
- Reboot Your Computer: After updating the driver, restart your PC to apply the updates.
5. Restore to Previous Driver Version (If Needed)
What to Do:
- Open Device Manager: Right-click on the Start button and pick Device Manager.
- Locate the Device: Find the device you updated (e.g., graphics card, network adapter).
- Open Properties: Right-click the device and select Properties.
- Go to Driver Tab: In the Properties window, click on the Driver tab.
- Click Roll Back Driver: If the Roll Back Driver button is available (it will be grayed out if there’s no previous version), click it.
- Confirm Rollback: Follow the prompts to roll back to the previous version of the driver.
6. Monitor Driver Updates and Avoid Over-Installing
What to Do:
- Avoid Unnecessary Updates: If your system is working fine and doesn’t require a driver update, it’s often better to leave it as is.
- Check Compatibility: Before installing any driver updates, verify that they are compatible with your system and hardware.
Additional Tips for Safe Driver Updates:
- Create a System Restore Point: Before updating drivers, create a restore point so you can revert your system back to a previous state if something goes wrong. To achieve this, type Create a restore point into the search bar and click Create under the System Properties window.
- Backup Drivers: You can use tools like Double Driver to backup your current drivers before updating them, making it easier to restore them if needed.
By following these steps, you can update your drivers safely and avoid any potential issues caused by incompatible or outdated drivers. Regular driver updates help improve system performance, add new features, and ensure your hardware runs optimally.
Conclusion
Read more: How do I make laptop faster: Top 8 Secrets to a Faster Laptop
Leave a Reply